

Welcome to our new series which we will be doing every day for the next few days before slowing down into a weekly series, or whenever something new comes out to do with Minecraft: Pocket Edition. This series will go over all kinds of things that you can do with Minecraft: Pocket Edition such as importing custom texture packs, how to get unavailable blocks and today’s subject, importing custom maps.
So when creating your own world, whether survival or creative, is just not enough, there are always custom maps other users have made. These can range from a small town on a generated map all the way to adventure and survival hardcore maps with goals to complete. This has been available in the PC version for quite some time now and it is possible to do it with Minecraft: Pocket Edition as well.
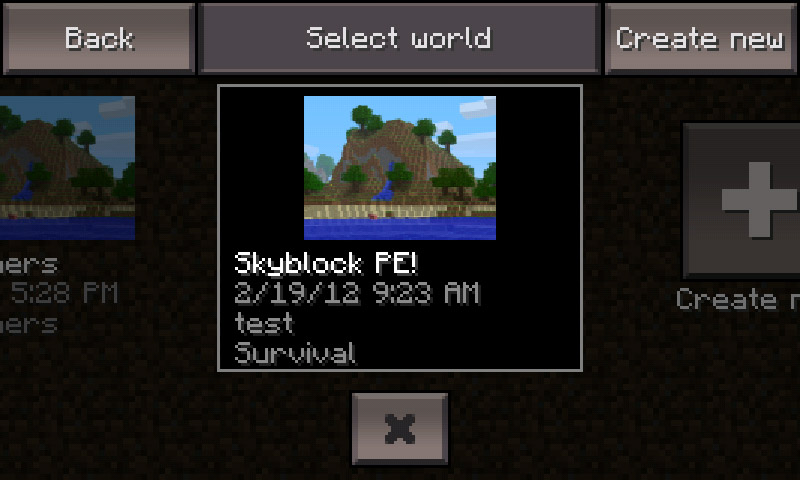

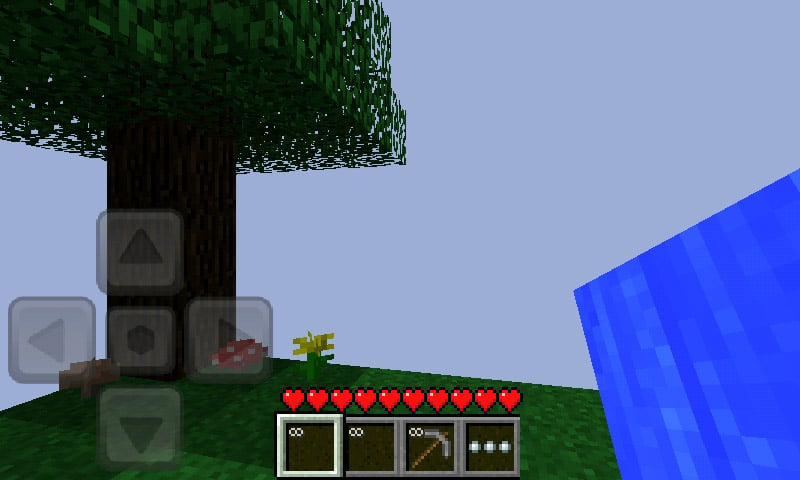
Picture 1 is the custom map. Picture 2 is a very far island I need to get to.
The first thing you will need is the actual map you want to import. There are plenty of sources where you can find these but the best is the official Minecraft.net forums. Just like the normal Minecraft, there is a Pocket Edition section which also has a custom maps forum. In there you will find lots of maps available to import while others are still being worked on. One last thing to note before getting started, this does not require root.
Alright so once you have selected a map to import, make sure of what type of map it is. Almost all adventures/survival/hardcore maps are meant for Survival Mode. Lots of the more showcase type of maps are usually for creative. Once you’ve imported a map though, it usually dictates what type it is automatically anyways. For this particular example I’m using the Skyblock Survival map.
Steps to importing a custom map
1) Unzip the folder you just downloaded which contains your custom map. Three files should be included in it. There are level.dat, chunks.dat and entities.dat. These files hold all the information for the map including all the structures, blocks available and so on. You may notice that once you’ve installed the map you have blocks available to you that you didn’t have before such as lava and water. They will be invisible in your toolbar but they are there.

2) Start up Minecraft: Pocket Edition and create a new map. It can be named anything although I would highly recommend it be one word. The map will end up changing the name anyways. When creating the map, pick the appropriate type, either Survival or Creative. Once your map is created, exit Minecraft: Pocket Edition.
3) Plug your device into your computer via USB and tansfer level.dat, chunks.dat and entities.dat to your SD Card. If you use ADB (which you have from having the Android SDK installed) just type adb push level.dat /sdcard/games/com.mojang/minecraftWorlds/YOURWORLDSNAME and where it says YOURWORLDSNAME change that to whatever you just named your new map to. Repeat the same line of command for chunks.dat and entities.dat.
NOTE: If you do not have ADB installed by having the Android SDK installed on your computer, just transfer all three files onto your SD Card then use a file management app such as Astro File Manager to move them over to /sdcard/games/com.mojang/minecraftWorlds/YOURWORLDNAME . Also be sure to capitalize “Worlds” in minecraftWorlds, otherwise it won’t work.
4) Once your files are in the folder for the map you created, start up Minecraft: Pocket Edition and you should see your new custom imported map available for you to play!
That is it. This should take no longer than 5-10 minutes for you to do. The longest part is actually picking out which map you want to play. Don’t go too far though, in the next part of Minecraft: Pocket Edition 101 we will show you how to properly install custom texture pack in Minecraft: Pocket Edition.